Showing posts with label Android Solutions. Show all posts

Tuesday, 22 October 2013

How to Root Samsung Galaxy Tab 3 8.0 and install Custom Recovery UPDATED


Warning: Follow the guide at your own risk, AndroidRevisited will not be held responsible if anything goes wrong by following the steps mentioned below. You’ve been warned! 


This tutorial will guide you on how to install custom recovery on the Samsung Galaxy Tab 3 8.0. This tutorial is very simple, so follow closely and it’ll not go wrong.

However before we begin I would like to warn you that while you install custom recovery on the device, there is a risk of brick any form of damage on your device. Its a good practice for you to backup your device to an external source apart froing your own device. So if you still want to proceed, you’ll be doing it at your own risk and we will hold no responsible form your own SD Card.

  1. Download the Odin307.zip TWRP_T31x_r3.tar .
  2. Extract the Odin307.zip that you’ve downloaded to a folder on your desktop.
  3. Copy and paste the TWRP_T31x_r3.tar file to the Odin307 folder that you’ve extracted.
  4. From the extracted folder, look for Odin_v3.07.exe and launch the application.
  5. Boot the Samsung Galaxy Tab 3 8.0 into Download Mode by pressing the Home , Volume Down and Power buttons together for a moment.
  6. Connect the tablet to your Windows computer using an appropriate USB cable.
  7. Your computer may prompt you that it’ll be installing a device driver at this point of time – do not interfere with the installation.
  8. Once done, the ID:COM box on the Odin interface should turn yellow.
  9. Select the PDA button on Odin and search for the TWRP_T31x_r3.tar file and run it.
  10. On the option section, make sure only the Auto Reboot and F. Reset Time are selected – and click on the Start button.
  11. Your device will reboot again.
  12. Congratulation! You’ve successfully installed the custom recovery on theSamsung Galaxy Tab 3 8.0 !
This is how you install custom recovery on the Samsung Galaxy Tab 3 8.0. Simple as it is, so if you follow the procedure closely you should be able to install it in less than an hour.

Tuesday, 10 September 2013

Galaxy SIII Full Review and Specs


Key Specs

  • 1.5Ghz dual-core processor
  • 2Gbs of RAM
  • 720×1280 (720P) 4.8″ Super AMOLED Display
  • MicroSD Card Slot / 16GB of Internal Storage
  • LTE (for AT&T and Verizon only, all others are HSPA+)
  • 8MP Rear Camera / 1.9MP Front Camera
  • Bluetooth 4.0 / WiFi / DLNA
  • Android 4.0.4 (Update to Android 4.1 in Q4 of 2012).

Hardware / Styling

  • Sleek design, but a bit plastic-y feeling
  • Huge screen but because of small bevel and specific aspect ratio, it doesn’t make the phone terribly large.
  • Simple
  • Still uses hardware buttons when all other Android 4.0 and up devices won’t.

Performance

  • Quick thanks to dual core processor and 2GBs of RAM, but can’t help but think how much faster it would be without Samsung’s UI on top (aka like the Galaxy Nexus)

Added Software

  • S-Voice – Siri competitor, it allows you to have a more “secretarial response” compared to Android’s normal voice command feature. Allows you to set appointments, call/text/email contacts, launch apps, etc.
  • S-Memo – A great memo app that originally launched on the Galaxy Note. Does what you’d expect it to; write and send notes, add images, draw on them, etc.
  • Video Pop-Out – This feature allows you to be watching a video and click the pop out button to make the video continue to play in a “window” floating on the device’s screen. As you change screens, it continues to follow you. Not sure how practical this is but it looks cool.
  • Smart Stay – Allows the device to use the camera after the screen times out to check if you are still facing the phone, if you are, it resets the screen timeout to keep the screen active.
  • Buddy Photo Share – Allows you to share photos with anyone else that has the All Share Play app on their device by connecting to the same WiFi network and launching the app (not in Market when I checked so only for Galaxy S II devices?)
  • WiFi Direct Sharing – Share videos or photos to any WiFi Direct enabled device (i.e. TV, Laptop, Tablet, other WiFi Phones, etc.).
  • S-Beam – Allows you to send large files like Videos and Photos over NFC/Bluetooth 4.0 instead of the normally included Android Beam that only lets you send YouTube videos, browser pages, contacts, etc.
  • Camera App – Burst shot has been added to the camera so you can take multiple pictures in a row to capture live action shots better. Also Best Shot has been added to allow you to take a burst shot and then it decides which picture is best and allows you to automatically delete the others after confirming.

Rooting / Customization

  • Device already has been rooted so you can remove the custom UI plus add other enhancements. ROOT YOUR SIII... Check here for our tutorial.

Pros

  • Lightweight
  • Large screen without making the device too large
  • Neat added software from Samsung (i.e. Video Pop Out,
  • Speakers are pretty loud
  • Camera is decent
  • 4G LTE (for AT&T) is fast

Cons

  • Samsung skin on device adds features, but slows the device down slightly and causes the device to have to wait a long time for upgrades to Android
  • Hardware buttons are unnecessary now that it’s running Android 4.0

How to Root Samsung Galaxy Tab 3 8.0 and Install Custom Recovery


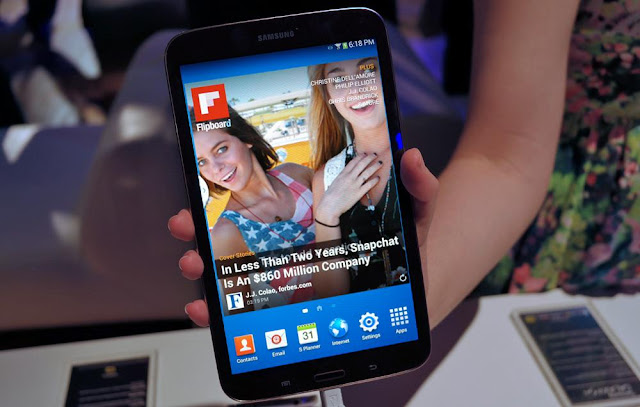
The latest iteration in the Galaxy Tab series, the Galaxy Tab 3, has a lot going for it.  The Galaxy Tab 3 8.0 specifically features a 5MP camera, 16 or 32GB of onboard memory, a dual-core 1.5GHz CPU with 1.5GB of RAM, and as its name suggests, an 8-inch touchscreen display.  The device is now rootable and also has a custom recovery ready to be flashed, so custom ROMs should also be on their way pretty soon.  The guide below should help you get ready to flash custom ROMs, by way of rooting the device and install custom recovery (TWRP Recovery in this case).Warning: Follow the guide at your own risk, AndroidRevisited will not be held responsible if anything goes wrong by following the steps mentioned below. You’ve been warned! 

Before You Begin

1.  Make sure you have backed up everything you care about from the device before you begin.
2.  Charge your device to 75% or more before you start.
3.  Install the proper drivers before you start.  Usually, installation of Kies will take care of this.

Necessary Downloads

2.  TWRP_T31x_r3.tar [or the latest version from this post under the Downloads section]

Installing TWRP Recovery on the Galaxy Tab 3 8.0

1.  Extract Odin307.zip to a folder on your desktop.
2.  Copy TWRP_T31x_r3.tar to the extracted Odin307 folder.
3.  Double-click on Odin3 v3.07.exe from the extracted folder to start the Odin tool.
4.  Power down your device and put it into download mode.  To do this, press and hold the Home + Volume Down + Power buttons simultaneously for 3 to 5 seconds until you see the warning screen.
5.  Connect your device to your Windows PC using a compatible microUSB cable.  If your PC installs drivers at this point, let it do so.  Once that is done, the ID:COM field on Odin should light up yellow, signifying that Odin has recognized your device without a problem.  If not, make sure you install the proper drivers (by installing Samsung Kies) and try again.
6.  Click on the PDA button on Odin and navigate to the location of TWRP_T31x_r3.tar to load it on to Odin.
7.  Make sure that only F. Reset Time is selected under the Option section and then click on Start.
8.  Your device will reboot once the procedure is done and you should have TWRP Recovery installed!

Rooting the Galaxy Tab 3 8.0

1.  Boot into recovery by powering down the device, pressing and holding the Power + Volume Up buttons until you see the Galaxy Tab 3 splash screen and letting go of the Power button once you see it.  Continue pressing the Volume Up button until you get to TWRP Recovery.
2.  Hold your device in portrait mode, and tap on Reboot on the bottom right of the screen and then select System on the next menu.
3.  You will be asked to install root.  Accept it and the device will reboot.
4.  Follow the on-screen instructions that will now appear after your device has powered on.

Alternate method for Rooting

If the section IV steps failed to obtain root, here is an alternate method to get you going.
1.  Copy the ROOT_SGT3_8.0.zip you downloaded above to your internal/external SD card.
2.  Boot into TWRP Recovery as detailed in Section IV > Step 1.
3.  Tap on Install once in TWRP Recovery.
4.  Navigate to the location of ROOT_SGT3_8.0.zip and select it.
5.  Swipe to confirm the flash.
6.  Go back to the main menu, tap on Reboot and then tap on System.
You should definitely be rooted after your device reboots.  To confirm, install Root Checker Lite from the Play Store or any other root requiring app and you will prompted to grant root access via the now-installed Superuser app.

How To Root Samsung Galaxy Victory 4G LTE


So you have just got a brand new Samsung Galaxy Victory 4G LTE and your hands are itching to root it, probably to play around with your favorite root-only apps and to give some custom ROMs a shot, then this guide’s going to help you. Rooting instructions, the easiest ones, have been given in the following procedure to help you root your device. So, follow them and get your device rooted in no time.

Warning: Follow the guide at your own risk, AndroidRevisited will not be held responsible if anything goes wrong by following the steps mentioned below. You’ve been warned! 

Before You Begin:

1. This will void the warranty of your device. However, you can reinstate the warranty by unrooting your device if there’s any unrooting procedure available.
2. You should have appropriate drivers installed on your PC. If you don’t, get them from here.
3. This works on Windows based PCs only.

Downloading Required Files:

1. TWRP Recovery (Download link’s given in the first post)
2. BusyBox (Download link’s given in the first post)
3. SuperSU (Download link’s given in the first post)
4. Odin (Download link’s given in the first post)

Rooting the Samsung Galaxy Victory 4G LTE (Virgin Mobile):

1. Download and place all of the files above to your Desktop.
2. Extract files from the Odin archive over to your Desktop.
3. Connect your device to your PC using the USB cable.
4. Copy both BusyBox as well as SuperSU files over to the root of your SD card.
5. Once both are copied, unplug your device from your PC.
6. Double-click on the Odin executable file and it should launch.
7. Click on PDA and select the TWRP Recovery file you downloaded earlier.
8. Uncheck the boxes labeled as Auto Reboot and Re-partition.
9. Turn OFF your device.
10. Turn it back on by holding down the Volume DOWN+Power buttons together.
11. Press the Volume UP button to go into Download mode.
12. Plug in your device to your PC using the USB cable.
13. Hit the Start button and it’ll begin flashing the file.
14. Once the file has been flashed, unplug your device from your PC.
15. Pull the battery out of your device and put it back in after a couple of seconds.
16. Now press and hold the Volume UP+Power buttons together.
17. Your device should reboot into the newly installed recovery mode.
18. From the Recovery menu, select Install and then choose the BusyBox file you copied earlier to your device.
19. Do the same for SuperSU file as well.
20. Once both the files have been flashed, reboot your device.
21. You’re rooted now!
Awesome! Your device has been rooted and is equipped with a custom recovery. Now flashing custom ROMs and mods isn’t a big deal for you!